Tutorial: Eggciting Effects by Jos� Campoy
Many of you will have admired recent work by Jos� Campoy in the
TalkGraphics forums
and in this tutorial he is sharing some useful techniques that anyone could use.
Step 1
Using the Ellipse Tool (Shift+F4), create an oval then give it a width of 138.5pix and a height of 168.6pix. It's easiest to do this while still in the Ellipse tool using its dedicated infobar.
Change to the Selector Tool (F2) and rotate your oval -10.5º.
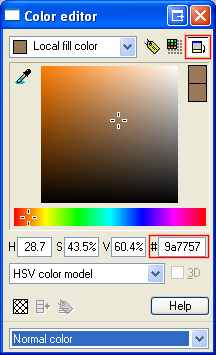
Remove the line from the oval by right clicking the No Color area, then click the button to its left to open the Color editor.

Click the icon in the top right to switch to advanced mode then give the oval a color of #9a7757.
Then apply feathering of 2pix.
Tip: Layers
In this tutorial you'll be creating quite a few objects which are copies of each other. You can have all these on one layer, but you may find it easier to create a layer for each object (if you are not familiar with the Layer gallery then you
might want to check out Tutorial 2).
To use layers to make this tutorial easier, open the Layer gallery by clicking the icon on the galleries toolbar, or press F10.

You can click Properties to name each layer if you wish. And to create your next layer just click New and give it a name.
Step 2
After you have created your second layer, click the oval and duplicate it (Edit > Duplicate or Ctrl+K).
To move the new object to the new layer, select Arrange > Bring to Layer in Front. (Ctrl+Shift+U). You will now have the original oval on the first layer, and your new oval on the second layer.
Give the oval a color of #b0793f following the same procedure as in step one.
Give the oval a Fractal Plasma transparency, then click in the oval and give it a fractal resolution of 350 DPI and fractal scale of 30%. After that, add feathering of 36.6pix.
Tip: selecting between layers
In the next step will need to clone something from your first layer. The safest way to do this is to make your second layer uneditable so that you can't accidentally select it. This way you can see what is on the second layer, but you can't touch it. To do this, uncheck the second box by the layer's name. Check it again to edit that layer later.
Step 3
Select the oval you made in step one, then clone it. Move it to a new third layer if required.
Give the oval the color #b79675 and apply feathering of 44pix.
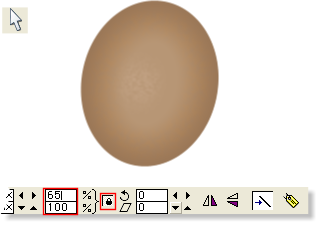
Step 4
Select the oval you made in step one, then clone it. Move it to a new fourth layer if required.
Give the oval the color #bd9b78.
Scale the width and height to 65% (if you have the aspect ratios locked, just change one and the other will change automatically) then apply feathering of 37pix.
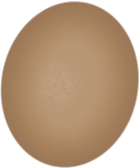
Step 5
Select the oval you made in the previous step, then clone it. Move it to a new fifth layer if required.
Give the oval the color #dabca4 and scale the width and height to 65%.
Give the oval a Fractal Plasma transparency, then click in the oval and give it a fractal resolution of 442 DPI and fractal scale of 30%. After that, add feathering of 40pix.
Finally, press Shift and the left arrow key once to move the oval.
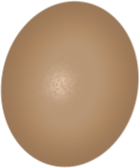
Step 6
Select the oval you made in the previous step, then clone it. Move it to a new sixth layer if required.
Give the oval the color #f1d5bf and scale the width and height to 65%.
Give the oval a Fractal Plasma transparency, then click in the oval and give it a fractal resolution of 800 DPI and fractal scale of 30%. After that, add feathering of 19pix.
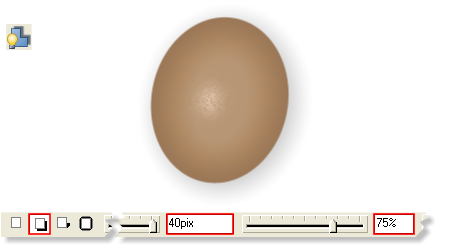
Step 7
Select your orginal oval on layer one, and select the Shadow tool (Ctrl+F2).
Give the oval a Wall shadow with a shadow blur of 40pix and transparency of 75%.
Step 8
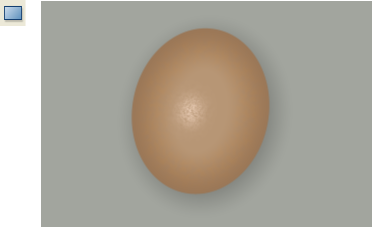
Your egg is now complete, but let's create a background for it.
Using the rectangle tool, on the first layer create a rectangle to go behind your egg. Send the rectangle to the very back, behind your egg, by selecting Arrange > Put to Back (Ctrl+B).
Remove the line from the rectangle by right clicking the No Color area.

Give the rectangle a color of #a2a59e.
Finally, clone the rectangle and also send it to the back (so you will have two identical rectangles together).
Step 9
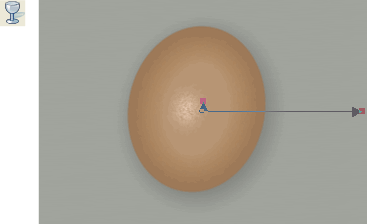
Select the top rectangle of the two, and give it a color of #9fa29b.
Give the object a Fractal Plasma transparency, and drag the vertical fill handle down and the horizontal fill handle to the right as shown in this picture.
This will give some "noise" for the background, but you can play around with this until you find an effect with which you are happy.
Step 10
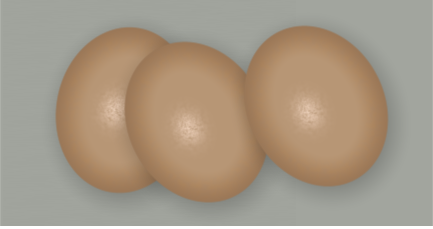
You're done. You should now have a finished egg! Copy, paste and rotate the egg if you want more of them.
�2006 Xara Group Ltd, created by Jos� Campoy.
|

