|
Webstyle
makes a breeze of creating a customized web page navigation bar with
cascading menus (like the example at the top of this page). This usually
very tricky task takes just a few simple steps to complete in Webstyle.
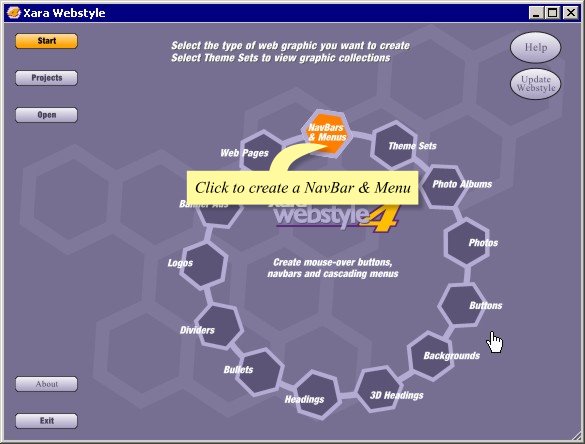
To
start, select the type of graphic you want to create, in this case a
NavBar & Menu.
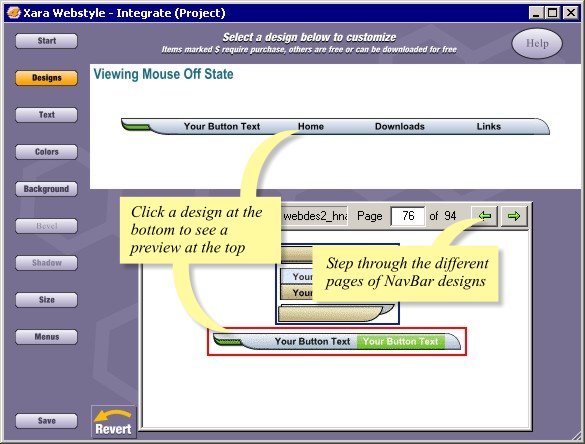
Now
you can see all of the NavBar designs available in Webstyle. You can
simply scroll through the choices by clicking the arrows at the top
right-hand side of the dialog box.
Now
you can edit your graphic by clicking the buttons down the left hand
side, which will open the editing dialogs. As you make changes the image
will be instantly updated in the preview window, making experimentation
easy.
To start creating your custom NavBar you will want to change the appearance of
the font and the color of your buttons, so click the Text button to open
the text editing dialog. To change the font, simply select the text
to change, then select the new font. The Advanced text dialog gives
complete control over the position of the text, tracking, line spacing
and aspect ratio.
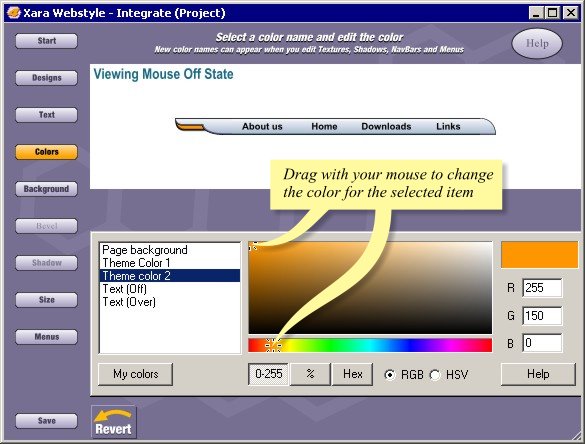
Changing
the colors is just as easy. Simply click the Colors button, select the part
of the graphic to change, then choose the new colors. It's the same
procedure for all of the elements of a graphic. And as you'd expect with Webstyle, all of the changes
take place instantly and can be viewed in the preview window.
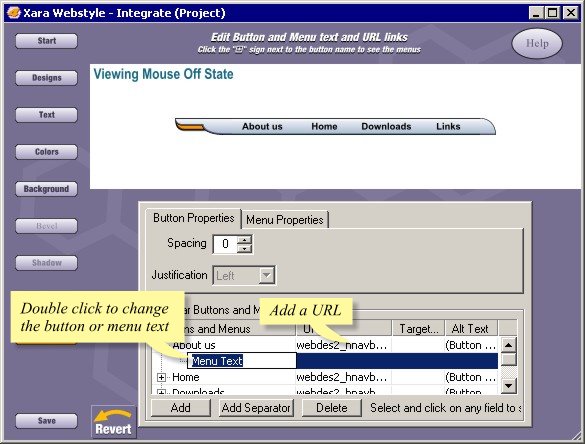
Next
you will probably want to add some buttons, change the button text and create some
new menus. So you click the Menus button.
To
create a New button, you simply double-click the blue 'Click to Add
Button' text and type your button text. A new button will automatically
be created. You can do the same to create menus and sub-menus. At any
time, you can re-arrange the ordering of the buttons or the menus simply
by dragging and dropping them to a new location or you can delete them
by selecting the button or menu and clicking Delete.
You
can change the button text by double clicking and simply typing in
the new text. URLs, target windows and Alt text can be added in the
same way, simply double click and type.
The
controls for the menu text and behavior are located in the Menu
Properties dialog. Here, you can set the menu font (as a brief
technical aside, the text on menus is different from the text on buttons.
The buttons in our NavBar are graphics whereas the menus are purely
HTML - which means that the fonts you can use for a menu are limited
to a short list of 'browser safe' fonts, which are shown in this drop
down menu). You can also set the font size, bold or italic, menu spacing,
the direction the menu will open and how fast it appears and transparency.
And you can add borders and separators to the menus.
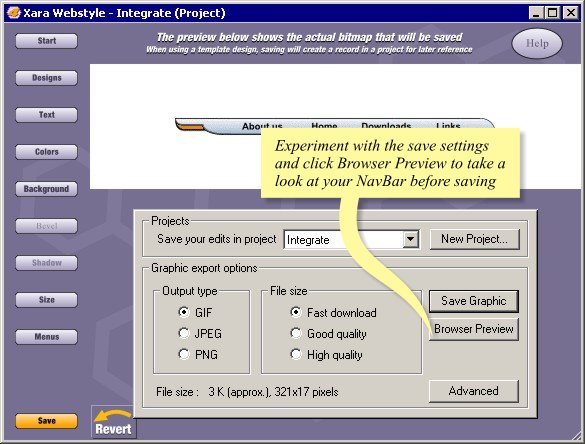
Once you have completed the changes to your NavBar, it's time to export
it. To save your NavBar and menus you just select the Save
option. Webstyle optimizes the graphics to be as small as possible
and displays the size in both pixels and k. The Advanced save dialog
also has options to change the number of colors, dithering and transparency.
It's interactive and instant - the size figures and the image update
as the settings are altered. Which means no more trial and error!
You can preview your NavBar in a browser at this point if you want
to, or simply export it. It will be automatically saved with all the
necessary HTML and JavaScript.
And
that's it, you've created your own custom NavBar with menus and it
only took a couple of minutes. Here it is!
|