Tutorial: Create Charts with Xara Xtreme and Xara3D 6 (NEW!)
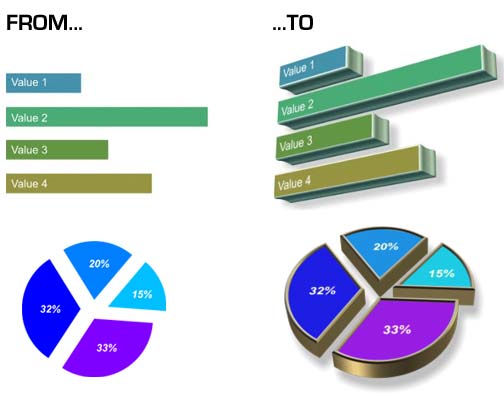
Xara Xtreme does not have any specific 3D charting capabilities, but it's very easy to create high quality 3D graphs such as these using Xara Xtreme in conjunction with Xara3D.
It's important to understand that when extruding a shape in 3D using Xara3D it takes only the shape data from Xara Xtreme, and not the colors. So to create a 3D image that has different parts in different colors, and with text labels or other details on, then this is a two stage process. First the shape is extruded as required, and secondly you export a bitmap of the colors, text etc and apply this as a surface texture to your 3D shape.
Bar chart step-by-step
- First draw the shapes you want to extrude. In the case of bar chart shown above these are just simple rectangles whose length is in proportion to the required value.
In the case of the pie chart, see here for a step-by-step on how to slice a circle up into segments.
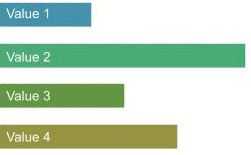
Apply any color or text labels you require. Do not put the labels outside of the shape, put them on top (if you put them outside they will be extruded as well which is not what you want). Keep the bars, pie segments or whatever you want to extrude to be simple shapes, as shown above.
- Select the objects (i.e. all 4 bars, but not the text), and copy these objects to the clipboard, Ctrl+C.
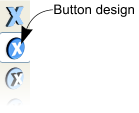
- Switch into Xara3D and select the Button design type.
Remove all default text (press and hold the Backspace key) then select Paste, or just Ctrl+V. This will display the shapes. You can adjust the 3D angle, shadows, extrude etc. using the normal controls. Or you can open a template file (or any Xara3D file) to load a preset (angle, extrude, bevel type, lighting etc) and then do a Paste. An example bar chart template file is available below.
Note: Sometimes you might find you have to adjust the size of the texture to be slightly less than 100%, especially if you have a large bevel.
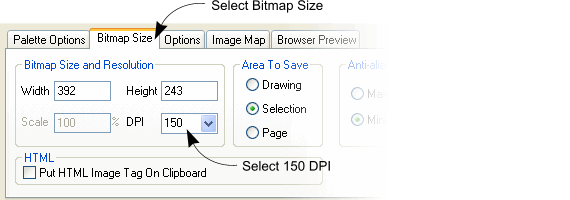
- Back in Xara Xtreme, with the same simple shapes selected, choose Export and export the selection as a PNG bitmap. Choose 24-bit True color type.

Select a suitable bitmap resolution. 150 dpi is good enough for most work. Save this file and remember where you saved it.
- Back in Xara3D open the Textures options panel. Select 'Button faces' from the drop down and select the 'Load texture' button. Locate and open the file you just saved in step 4.

Make sure the Size field is 100% and all the other fields (Angle, X, Y) are set to zero. You should now have your finished 3D graph or chart. You can of course further adjust the angle, lighting, shadow etc.
- Select Copy or Ctrl+C, switch back Xtreme to and Ctrl+V.
In Xtreme you can adjust the rotation, scale, and can add a graph key or any other aspects that you want in 2D.

Pie chart step-by-step
Here's how to create a sliced pie.
Slicing a circle up into segments for a pie chart requires a few simple calculations.
First I assume you have your data expressed as percentages. For example let's say you require 4 sections of your pie, to represent 15%, 20%, 32%, 33%, totalling 100%
You must convert these into angles, as percentages of 360�. So 15% of 360 is 54 so that segment will be 54�. It's probably best to create a small table, if you have more than a couple of segments:
15% = 54�
20% = 72�
32% = 115�
33% = 119�
(The odd fractions of a degree do not matter, so best to ignore them).
The way we slice up a circle into these segments is to draw some lines radiating out from a central point, at the required angle, like this:
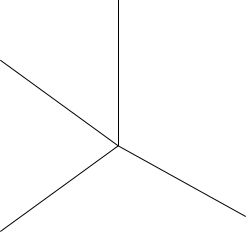
- First draw a simple vertical line using the Shape Editor tool or Freehand tool. (Using the Freehand tool, click, and then holding Ctrl and Alt keys drag downwards.)
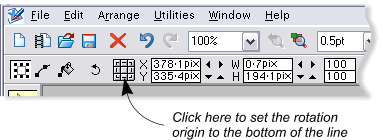
Select the rotation origin to be the bottom of the line.
- Clone the line. (Edit -> Clone or Ctrl-K.)
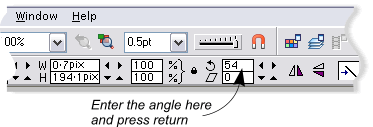
- Enter the required angle from your table.
- Repeat steps 2 and 3 for each of the entries in your table, omitting the last one. You should now have a set of lines radiating from a central point like this:
- Select all the lines and select the Arrange -> Join Shapes menu option. The status line should now show 1 line.
- Draw a circle that's smaller than the lines. (Select Ellipse tool and drag with Ctrl held down).
- Select the 'Snap to objects' option on the top button bar (magnet icon). And now drag the center of the circle so that it's over the center of the lines. The Pointer will show a small magnet icon when it's snapped to exact center.
(Tip: If you're not quite sure of where the center of the circle is you an make a good guess and xara will usually snap to the correct position. Or you can select 'Show object edit handles' button on the left of the Selector tool, and now when you select the circle the center is shown).
Put the circle to the back (Ctrl-B).
So now the circle is exactly under the lines like this.
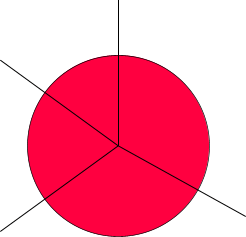
(I've drawn a red circle but the color does not matter).
- Select the lines and circle and the menu option Arrange -> Combine Shapes -> Subtract Shapes.
- Select Arrange -> Break shapes.
Your circle is now cut up into the required slices.
You can color each of the segments as required and drag one segment out if you want to highlight it.
Add any captions you want on top of the segments e.g.

In this example the outline has been removed as well to clean it up.

And this is the resultant 3D extruded version from Xara3D. Refer back the bar chart step-by-step above on how to create 3D shapes using Xara3D from Xara Xtreme.

Here I've separated each of the segments, and used a different bevel type and light colors. You can load the Xara3D templates for these examples.
�2006 Xara Group Ltd.
|